Bicycles Built for Two
DKW NZ 350 German Motorcycle
German Kubelwagen Jeep
Nike / Ajax Surface to Air Missile (SAM)
M1A1 (HA) Abrams Tank
Bicycles Built for Two
Kit: Both bikes were scratch built, using only the seat and handle bars from the Tamiya kit
Scale: 1/35th
After-Market: Aber Photo-etch
Year Built: 2001
Work Performed:
The 'civilian' bike includes a chain guard and a basket with a bottle of wine and loaf of bread. The German military bike was configured military specs such as no chain guard, wheel generator for front light, tool kit and luggage rack. Both bikes feature vac-u-formed fenders and spoke wheels.
Back To Top
DKW NZ 350 German Motorcycle
Kit: Tamiya
Scale: 1/35th
After-Market: Aber Photo-etch
Year Built: 2000
Work Performed:
The engine was separated and a new frame was built (engine comes molded to the frame), fenders were vac-u-formed, scratch built rims with Aber spoke wheels, and assorted plumbing.
Back To Top
German Kubelwagen Jeep
Kit: Tamiya
Scale: 1/35th
After-Market: Aber Photo-etch
Year Built: 2002
Work Performed:
The engine and suspension was modified and detailed, front wheel removed (Tamiya gives you the rear wheel removed in their detail kit), rear stowage opened, brake lines added, and LOTS of Aber photo etched pieces. The Kubelwagen represents a 1942 vehicle that has been repainted with the German Desert Yellow per 1943 specs. Hence the Panzer gray interior and the yellow exterior.
Back To Top
Nike / Ajax Surface to Air Missile (SAM)
Kit: Scratch Built
Scale: 1/48th
After-Market: None
Year Built: 1990
Work Performed:
The entire project was scratch built using photos and measurements of the real thing.
Back To Top
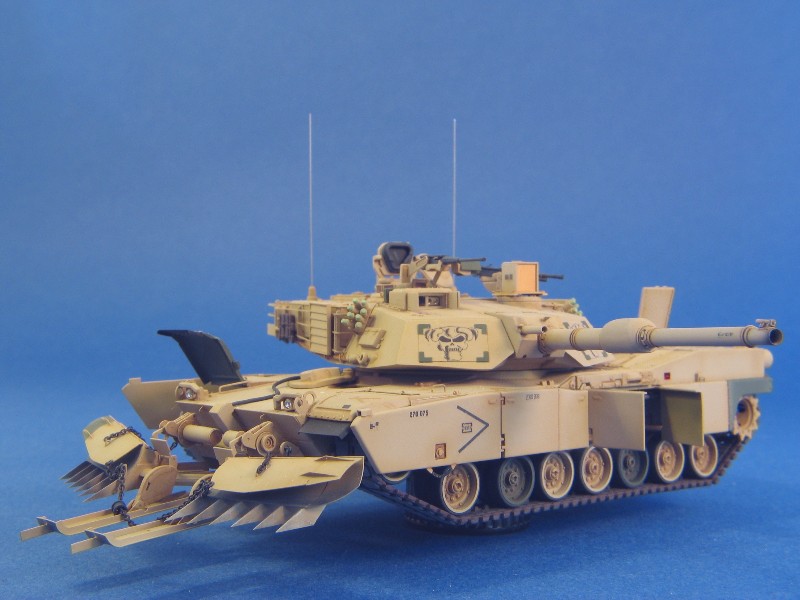
M1A1 (HA) Abrams Tank
Kit: Revell
Scale: 1/72th
After-Market: PART, Eduard
Year Built: 2004
Work Performed:
This 1/72 scale Revell M1A1 HA (Heavy Armor) kit is a beauty to
build, and with a little work and the use of after-market sets from
PART and Eduard, makes a very nice replica of the US Marine Corp
main battle tank.

The tracks were upgraded (photos 1-4) by sanding off the "football"
style tread patterns and replacing each link with the correct
"Bigfoot" style pad. There were about 400 cut and sanded pads for
the track (Arg!). I scratch built a new right front fender in the
lifted position to better see the new tracks.
The rear engine panels were opened up and new rear engine grilles
were made. I wanted to be able to remove the scratch built
engine/transmission pack so I hinged the rear panels to open like
on the real tank. I also replaced the solid engine deck screen with
Trimaster screen and added tail light housing units, which look
much better due to the scale thickness than the molded-on kit units.
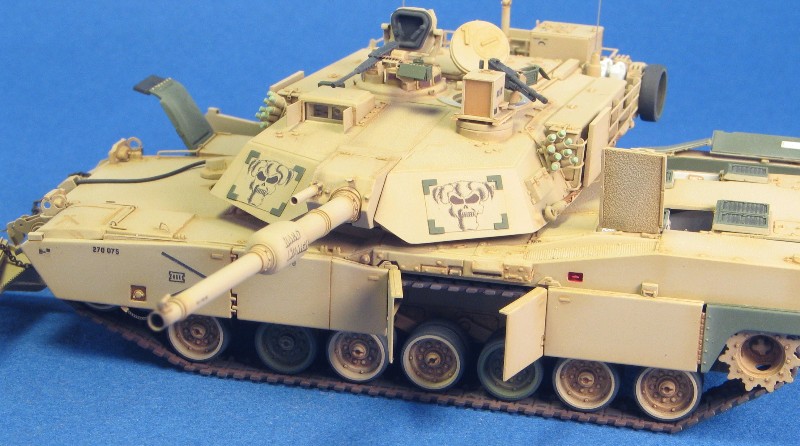
The side skirts were modified to represent the M1A1 HA in configuration
and thickness. This is perhaps the weakest point on the Revell model,
especially since they incorrectly molded the right hand side skirts to
be the same as the left hand side skirts. The panels are not symmetrical
on the real tank. Panels 1 and 2 on the left hand side of the tank
and panels 1 through 4 on the right hand side of the tank are armored
and therefore thicker than the rest of the side skirts. I also added
mud holes to the rear drive sprockets, which was easy to accomplish
and adds an obvious detail otherwise missing on the model.
Here is a photo of the engine bay...
...and a photo of the parts and pieces that were made removable for
ease of painting and assembly.
The engine compartment was painted off-white and then weathered using
oils and pastels. These engine bays can get quite grimy during
operations. Given the small scale, the silver heat shields, which
are a prominent feature protecting the black cells in the engine
bay, were painted.
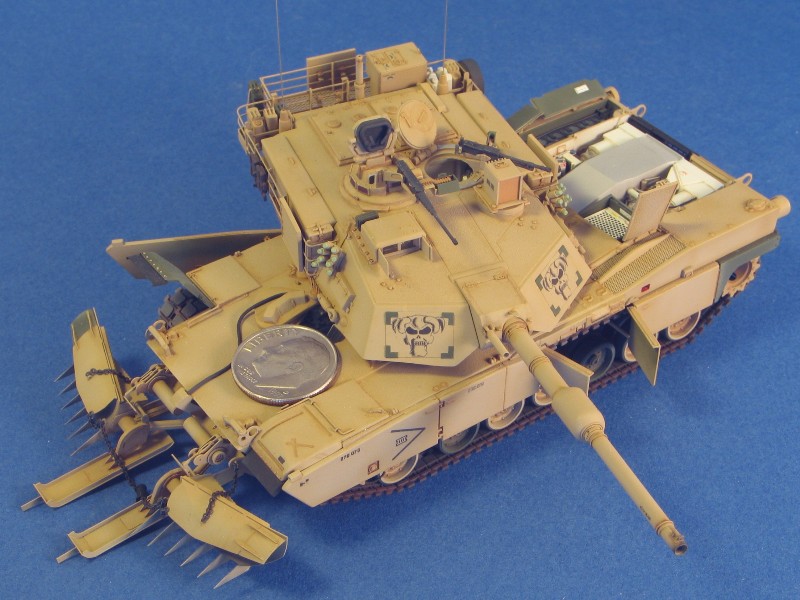
The mine plough is from PART - a real beauty of a set but be warned,
since the instructions have a few holes in them. It almost takes two
units to build the plough - one to build it the first time and the
other to learn from your mistakes and build it correctly the second
time. Once it is done however, it is stunning.
The driver's compartment was scratch built and although small, provides
a treat for someone who looks inside.
The main gun was scratch built using various sizes of brass tubing.
The small rings around the gun were made from heat-forming stretched
sprue and strip around the same diameter brass tubing as that of the
gun barrel. Pieces were then cut and added to the brass barrel.
The interior was scratch built using available reference photos and
drawings, and again painted off-white with an oil wash.
The bustle rack extension was done with small styrene rod for the rails
and drilled strips for the supports, and added to the modified PART
bustle rack.
The smoke dischargers are turned brass and the extras on the chassis
(panel supports, bumpers for the wheels, mud scrapers, etc.) were
added using various pieces of rod and strip plastic. A scratched
MCD (Missile Counter Device) was added on top of the "manhole". The
doghouse includes a complete optics sighting system.
The markings were scanned and reduced from the oustanding Echelon
set, representing a US Marine M1A1 HA nicknamed "Hard Lighter" of
'B' Company, 1st Marine Tank Battalion, 1st Marine Divion, Operation
Iraqi Freedom, March, 2003.
This tank represents a Marine M1A1 HA that was originally painted in
the factory NATO green scheme and then repainted sand during Operation
Iraqi Freedom, the interior of the various compartments (such as the
battery compartment) as well as the underside of the engine deck panels
were painted green. Certain replacement parts such as road wheels, the
number 7 skirt (back end of the tank), pieces of the mine plough, and
fenders were typically not painted before being added to the otherwise
desert-sand painted tank. This afforded an opportunity to add a bit
of color and interest to the Abrams model.
This model is dedicated to the crew of "Hard Lighter" and all the
other men and women serving in Iraq.
Back To Top